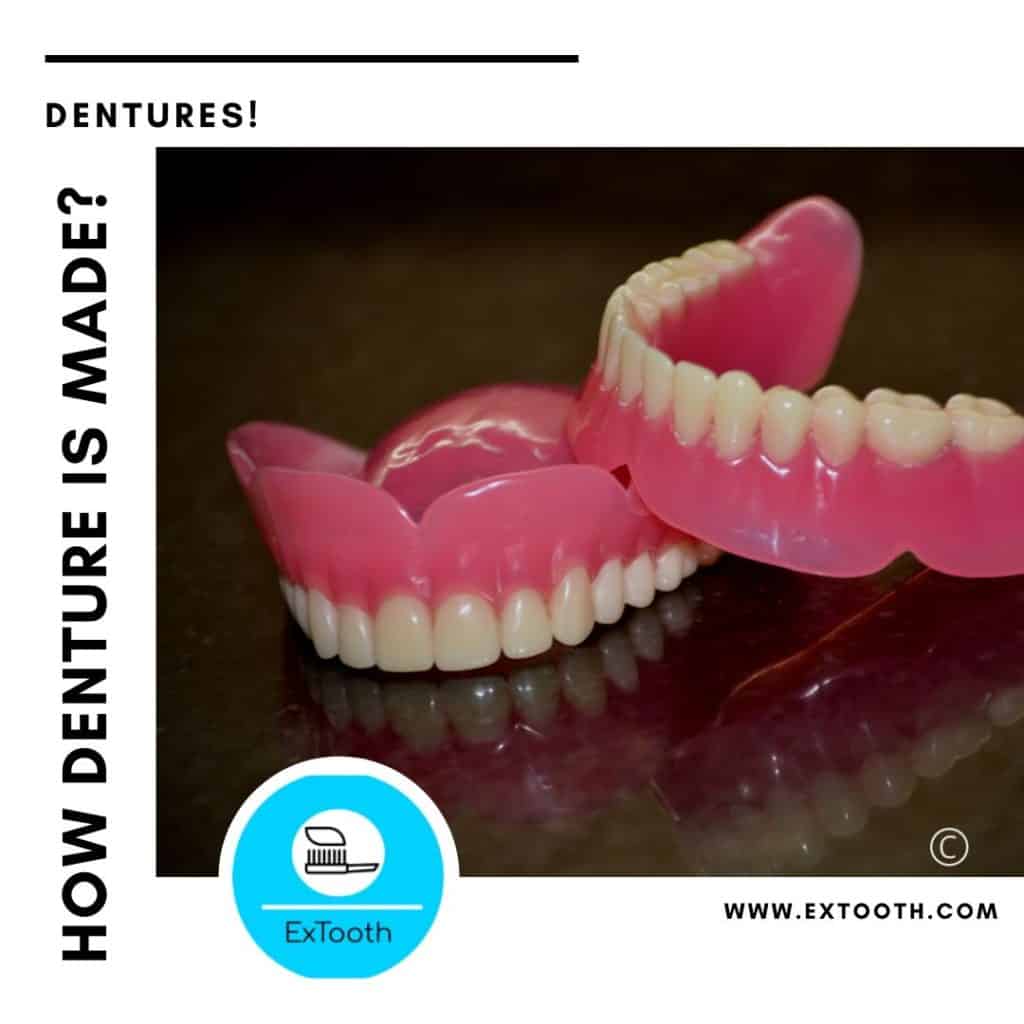
How dentures are made for a whole new smile!
When you miss all your teeth, muscle sag, and create wrinkles. Losing teeth make you look older. Complete dentures cover the vacant space and make the lines fade.
A complete denture is a set of custom made teeth that can be separated and put back in the mouth by oneself. They replace upper, lower teeth and part of tissues in the mouth.
Though complete dentures don’t give the feeling of natural teeth but help in chewing food and makes you look better.
It’s hard to imagine speaking and smiling without any teeth.
But a dentist or a prosthodontist can offer you a solution to your problem.
You feel like smiling again after getting dentures. Complete Denture improves facial appearance and self-confidence.
Are you wearing complete dentures for the first time?
You may feel a little awkward initially.
You may see a difference in the way you speak or eat.
One of the drawbacks of wearing a complete denture could be an alteration in taste sensation.
Due to acrylic, a material used for the fabrication of a denture, you may not be able to feel hot or cold.
In the beginning, your complete dentures are of exact fit, but you may realize looseness over time. Bone starts resorbing after tooth loss resulting in a change in the mouth. This situation may require you to visit your dentist for readjusting or relining.
You may need denture adhesive if your dentures are too loose.
Are you looking for a permanent solution?
A Dental implant is a permanent solution as it replaces both tooth and root.
Looking after your complete dentures
We advise you to wear your full dentures all the time for the first 24 hours to get used to them.
You can remove them later on while sleeping as it allows your gums to rest.
If your dentures are not in your mouth, then they should be in water or cleaner solution.
Clean the dentures as you brush your teeth.
Know how to clean your dentures at home.
What is the best material for Dentures?
Dentures stand for custom-made replacements for desiring teeth and can be carried out and set back into your mouth.
Dentures can be made of
- Acrylic,
- Resin-based,
- Metal based alloy ,
- Polyetheretherketone, a thermoplastic polymer, and many more materials.
The proper material can be judged only according to the individual needs of the patient and the intra-oral findings.
The material practice also varies depending on whether it is a complete or partial denture. It depends on what you are aiming for. Denture materials come with their pros and cons.
If you want superior thermal conduction, the metallic base is preferred.
If you wish for lighter weight, acrylic resin is better.
A significant advantage of acrylic denture bases is that it is simpler to add a new denture base or add new teeth to an existing denture.
If you are looking for flexibility, there are super-polyamides, which is a type of nylon used for creating flexible dentures.
Cost varies as the material is improved.
A prosthodontist (denture specialist), in this case, is the best person to take advice from. A person with clenching habits, we prefer metal reinforced denture. In case you need advice for your specific situation, feel free to ask us.
Can dentures be made at home?
Many years ago, I saw a blog about a fellow who found the perfect size pebbles in his driveway and somehow sealed them on to some plastic he made for his denture base, and voila made teeth out of rocks. Now that is some creativity.
Procedure
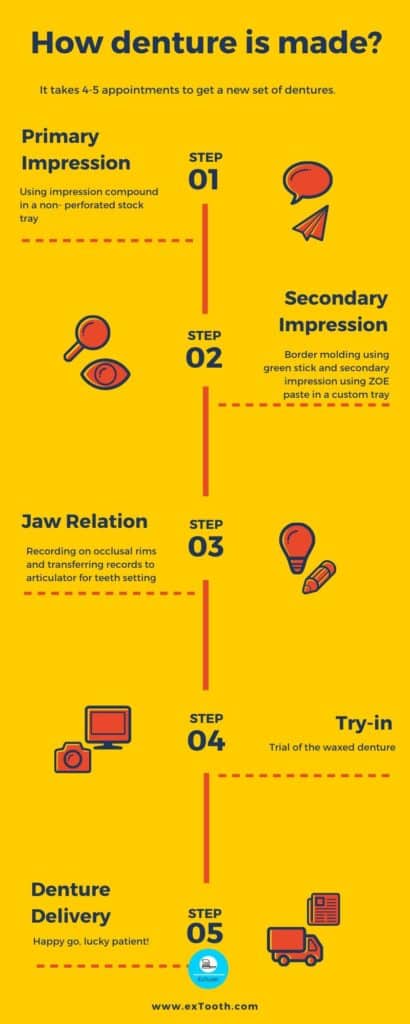
Usually, the whole process takes five appointments to finish off a complete denture.
Primary impression, final impression, jaw relation, the trial of the waxed denture, insertion/ delivery are the steps of making dentures.
Modern ways of complete dentures
Complete dentures in just three appointments
This miracle occurs by substituting the heat cure material with light cure resin for the tray. Thus abandoning the lab procedures correlated with the traditional method.
How denture is made?
It demands 4-5 visits to make a new set of dentures.
You must be wondering how dentures are made. I am going to elaborate on the procedures on how dentures are made!
IMPRESSION
The first move in making a denture is taking an impression.
An impression is a print or negative resemblance of the teeth and dental impression edentulous area and adjacent tissue.
An impression is a negative recording of the entire denture bearing, and border seal areas of either the upper or the lower jaw present in the edentulous mouth.
Proper measurement is vital for an excellent fit dress. Likewise, a good impression is essential for a stable fit denture.
A good impression is the most crucial step for a stable denture.
Furthermore, Prosthodontist should continuously keep in mind the effect of impression material and technique and the impact of the denture base on the both the soft and hard tissues of the jaws. Pressure impression technique is displayed as the pressure in the denture base and results in soft tissue damage and bone resorption.
Retention or snug fit of denture depends on the anatomical and histological factors of the ridge and the way of pressure directed on the ridge during the impression making procedure. Therefore the maximum coverage provides more significant support, which distributes forces as wide as possible.
The best bone for denture support is the compact bone.
Support = Denture base + Bone + soft tissue
The stability reduces with the loss of vertical height of the residual ridges or with an increase in flabby, movable tissue.
Stability = Denture base + Bone
Border thickness varies with the needs of each patient following the degree of residual ridge loss.
The vestibular space should be filled, but not overfilled, to restore facial contour.
Retention is related the denture base to underlying soft tissues, while stability is related to the underlying bone.
Retention = Denture base + soft tissue
Retention holds the denture in its place when it is seated at rest.
Stability must resist displacement by rocking of a denture over a limited area.
An impression that records only the depth , but not its width of the sulcus, lacks sufficient retention.
For this reason, in the second appointment, we take another impression known as a secondary impression.
In complete denture, we make two impressions for the acurate fit of a denture.
Materials used for recording impressions for complete dentures –
- Impression compound
- Alginate impression material
- Putty consistency – silicon rubber base material
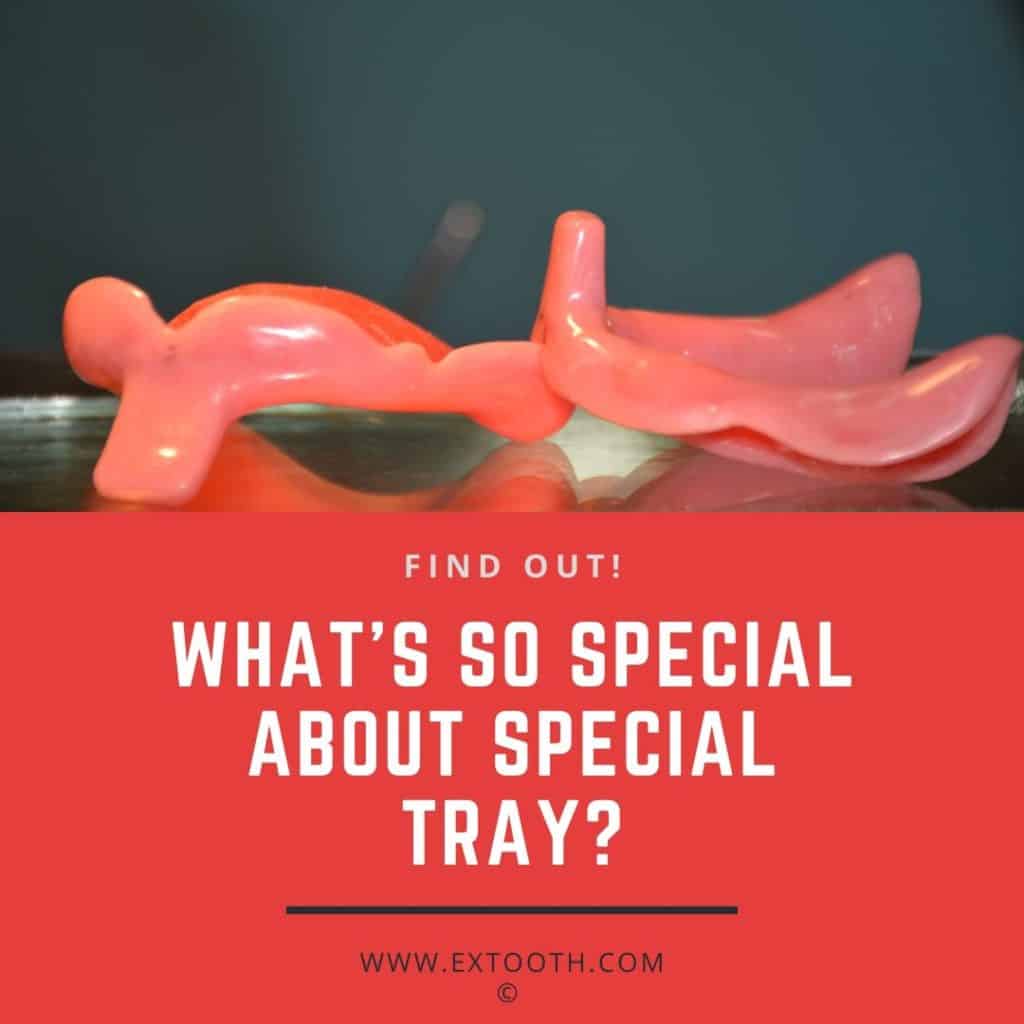
Tray for holding impression material for complete dentures –
Tray used to carry, confine, and control the impression material for making an impression.
During an impression, the tray supports insertion and removal of the impression material from the patient’s mouth.
It consists of:
Body: a) Floor b) Flange
Handle
There is an upper tray and lower tray; the difference between them is that, in the upper tray, there is a palatal portion called vault, and in the lower tray, there is a space for tongue.
Handle is placed in the middle region so that it will not interfere with lip during impression procedure.
Types of trays
Stock tray:
We use it for the final Special tray. It is also called an individual tray or custom tray.
It is an impression tray assists in carrying the material to the mouth and support it in the right position while it is hardening.
We use this tray to make a primary impression. It is build of different materials such as Aluminum, Tin, Brass, or plastic. It comes in a variety of shapes, sizes to fit the different mouths.
1 – Stock tray for the dentulous patient.
2 – Stock tray for the edentulous patient.
A non-perforated tray to take impression from impression compound, because it will be stick on the tray. we use a perforated stock tray to make impression from alginate for mechanical retention of impression material to the tray surface.
According to the size of the arch, a stock tray comes in different sizes. There should be 4-5 mm of space for impression material.
We pour a primary cast from the primary impression with plaster, which is the positive reproduction of the oral tissues.
Master or secondary casts made of dental plaster.
After beading and boxing, impression is poured in plaster mixed with water in an appropriate portion.
While the plaster becomes hard, the cast is immersed in hot water (55-60ºC).
When using boiling water, the impression compound will be sticky, and it will be difficult to remove from the cast.
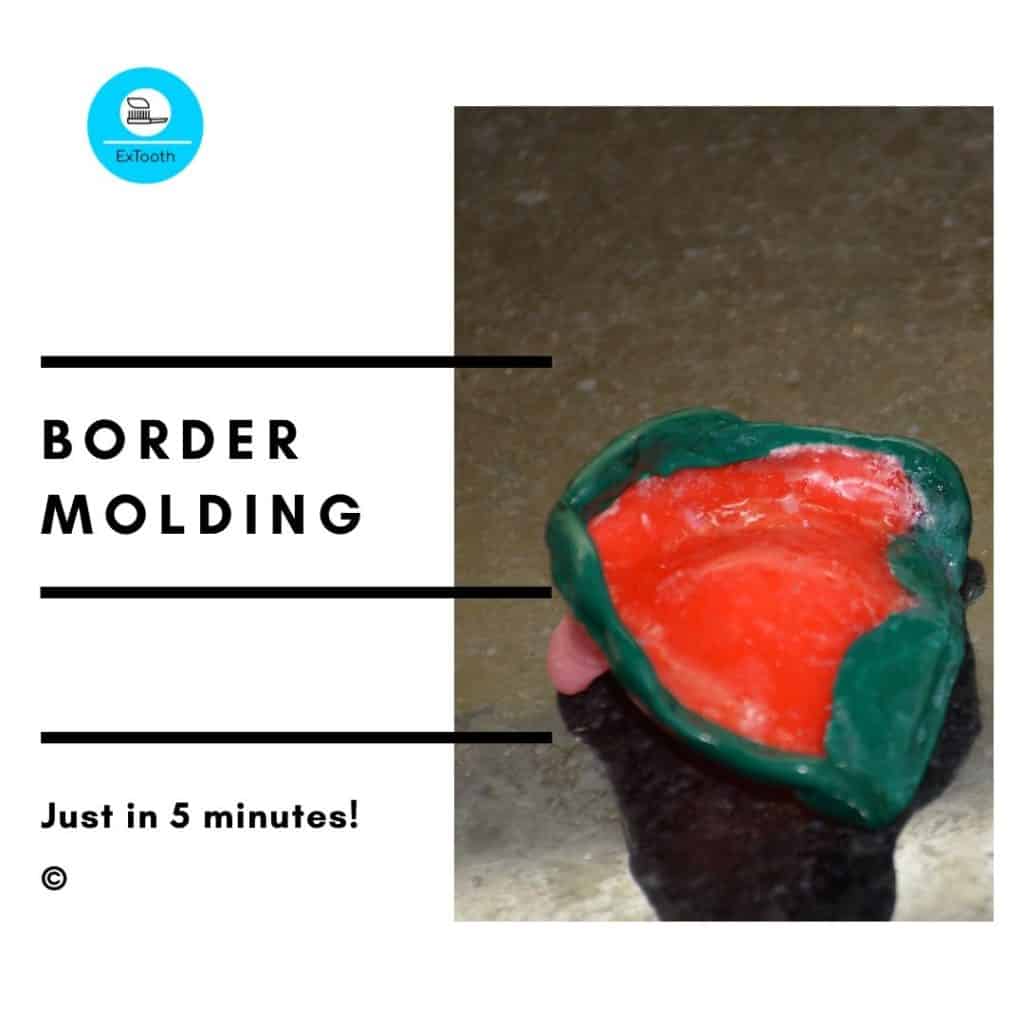
Soak the cast in water first. Undercuts are blocked out using wax or plaster. With a pencil, borders of special tray and relief areas are marked.
The borders of tray marked on the cast are grooved deeper using a carver or a pencil, and this acts as a guide to trim the tray later.
The employment of separating medium on study cast is a must.
Special tray is made using cold cure acrylic resin by either dough or sprinkle on technique.
Maximum thickness of 2 mm of spacer is covered with the exception in the posterior palatal seal area.
The spacer should be cut out in 2-4 mm places so that the special tray touches the ridge in this area. A spacer is done to stabilize the tray during impression making.
The part of the special tray that stretches into the cut out of the spacer is called stopper. Usually, we plant four stoppers, two on the canine eminence, and 2 in the molar region on either side.
The use of separating medium on the exposed surface of the cast (stopper areas) is a must.
When we take out the special tray from the cast, the wax spacer is sound within the tray for its proper positioning in the mouth during the border molding procedure.
The powder and liquid are mixed in a mixing jar. Following mixing the monomer and polymer the mix undergoes five stages (sandy stage, stringy stage, dough stage, rubbery stage). Material is handled in the dough stage, to achieve a uniform mix. This dough is pressed between two glass slabs to make 2mm thick sheet. Then cut the excess material with a B.P blade. Then the material should be held in place until its whole polymerization. After that, the excess dough material is used to make a handle.
Make irregularities in the ridge area on the top of the tray anteriorly at the center to secure the handle from acrylic resin and join it to the tray. The benefits of this technique introduce its easy use and minimum wastage of resin.
In sprinkle on technique, the powder is scattered, following soaking with drops of liquid.
SECONDARY IMPRESSION – SECOND APPOINTMENT
The tray should be hard and of adequate uniform stiffness that it will not break during its usage. The special tray must not invade free structures.
The margins need to be (2 mm) under extended.
The back ends of the impression tray should be somewhat overextended to secure the incorporation of the posterior detail for the construction of the post-dam space in the upper tray.
The tray must have a grasp for guidance, and the handle must not hinder the operative movement of the oral structures.
The tray must be even on its displayed surfaces and should have no sharp corner or edges which would injury the patient.

The materials we use for a second or a secondary impression are
- Zinc Oxide Eugenol impression material
- Alginate impression material
- Elastomers impression materials (Rubber base)
- Impression plaster.
Irrespective of which material is chosen, the best result will be obtained if the custom tray is well built and polished correctly.
Why an impression again- secondary impression?

An individualized impression tray goes on the cast received from the primary impression. On the primary cast (study cast), the special tray is created because the edentulous ridge reveals alterations in shape and size, some have leveled ridges, and others have a bulky ridge. The stock tray can fit the ridge only in an arbitrary manner.
A special tray, on another hand, is more perfectly readjusted to the oral vestibules. This accuracy helps in better retention of the denture. A special tray is less heavy than the stock tray, which is more convenient for the patient.
Beading and Boxing procedure: Laboratory step
Beading is formed to conserve the girth and extent of sulcus to transfer in a cast.

Boxing is the enclosing of an impression with a beading wax to design the wanted size and form of the foundation of the cast. Boxing is bypassed on the impression obtained from alginate because the boxing wax will not adhere to the impression material as well as the alginate can be easily distorted. In such a scenario, we join a strip of wax throughout the edge of Beading wax. The impression around 2-3 mm beneath the border; and sealed to it with a wax knife.
A sheet of wax is used to make the vertical walls of the Boxing wax. It is added around the boundary of the beading wax so that it does not modify the margins of the impression, the breadth of the boxing wax is about 9-15 mm.
A leaf of wax can be used to close the tongue space with the Baseplate wax: a mandibular impression that is sealed just below the lingual border of the impression.
After beading and boxing, we pour both the impressions in Dental Stone.
Record bases made on the secondary cast poured in the Dental stone, which mimics the denture.
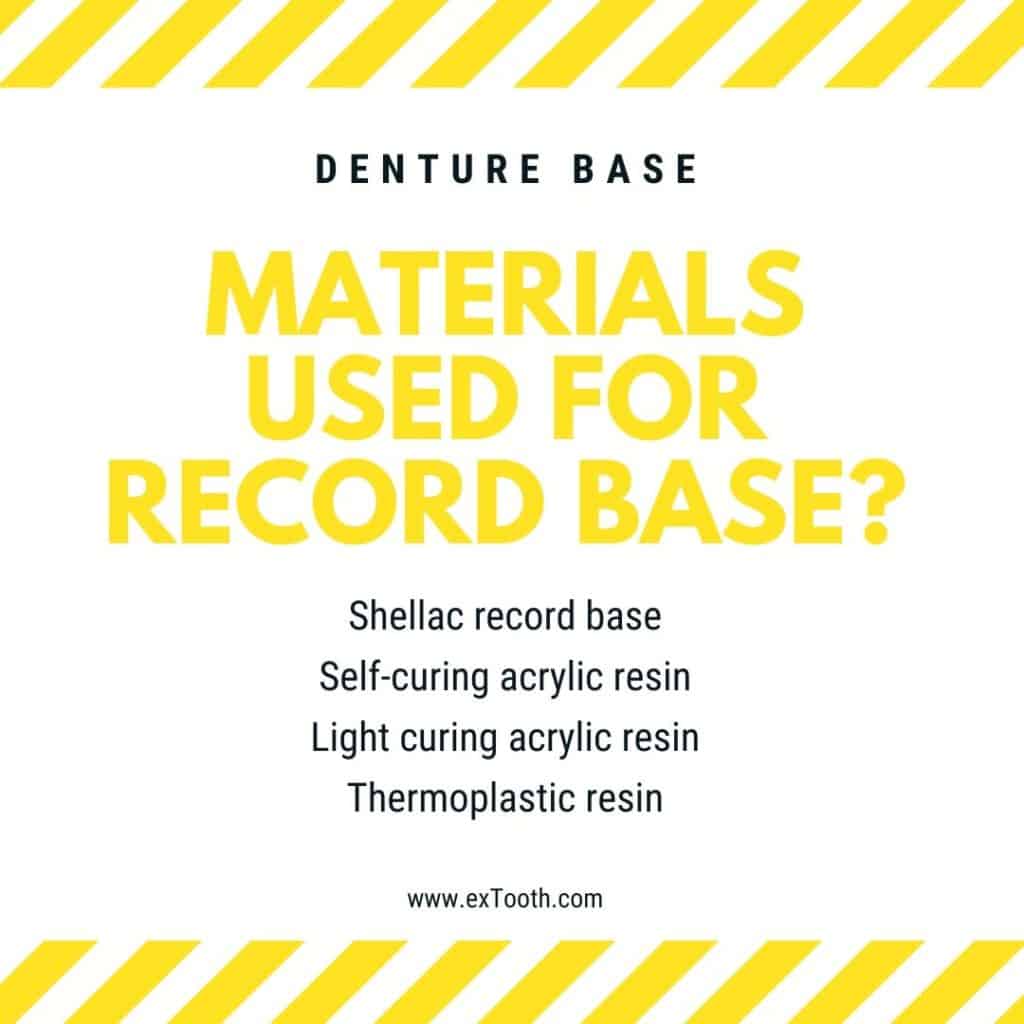
Materials used in the production of a record base
- Shellac record base
- Self-curing acrylic resin
- Light curing acrylic resin
- Thermoplastic resin
Occlusion rim is occluding surfaces constructed on record bases to make maxillomandibular relation records and for arranging artificial teeth.
Materials used in the creation of occlusion rims
- Bite block wax
- Baseplate wax
- Modeling compound.
We use Waxes more frequently; since it is easier to manage in the registration and in arranging teeth.
The anterior border of the maxillary rim should have an insignificant labial slant, and the maxillary labial surface should be nearly 8 mm anterior to the line dividing the incisive papillae.
The finished wax rim should be 4 mm broad anteriorly and progressively shifts broader posteriorly by 7 mm.
The occlusal length of the maxillary rim should be 22 mm long from the bottom of the sulcus at the area of canine eminence (lateral to the labial frenum) and 18 mm long when measured from the bottom of the sulcus in the posterior part (from the buccal flange to the tuberosity area).
JAW RELATION – THIRD APPOINTMENT
The margins of the record bases and the shinning surfaces of the occlusion rims should be smooth and round; since flat and finished surfaces are conducive to patient comfort and relaxation.
Determining of jaw relation which includes:
- Determining the orientation of maxilla to the cranium
- Determination of the vertical dimension
- Determination of the horizontal (centric and eccentric jaw relations)
Importance of the Jaw Relation step?
The precise prosthodontic approach sustains a direct relationship to the temporomandibular system. Occlusion is one of the most crucial elements of the treatment of complete dentures.
The temporomandibular joints influence the dentures, and likewise, the dentures gamble the health and role of the joints.
The mandibular bone has unique relationships with the bones of the skull.
“Orientation relation is defined as the jaw relation when the mandible is in its most posterior position, and it can twist in the sagittal plane around an imaginary transverse axis passing through or near the condyles. This record gives the position of the maxilla to the base of the skull. “
It is important to do orientation jaw relations before taking other jaw relations. The casts on the articulator must correlate to the hinge axis of the device in as almost as plausible the same way as the jaws associated with the patient’s curve of closing. This relation can be registered by means of the face-bow.
Can we do without a face-bow?
The mounting of the maxillary cast without face-bow records can create mistakes in the occlusion of the final denture. A face-bow transfer enables minor adjustments in the occlusal vertical dimension on the articulator. It assists sustain the maxillary cast while it is fixed on the articulator.
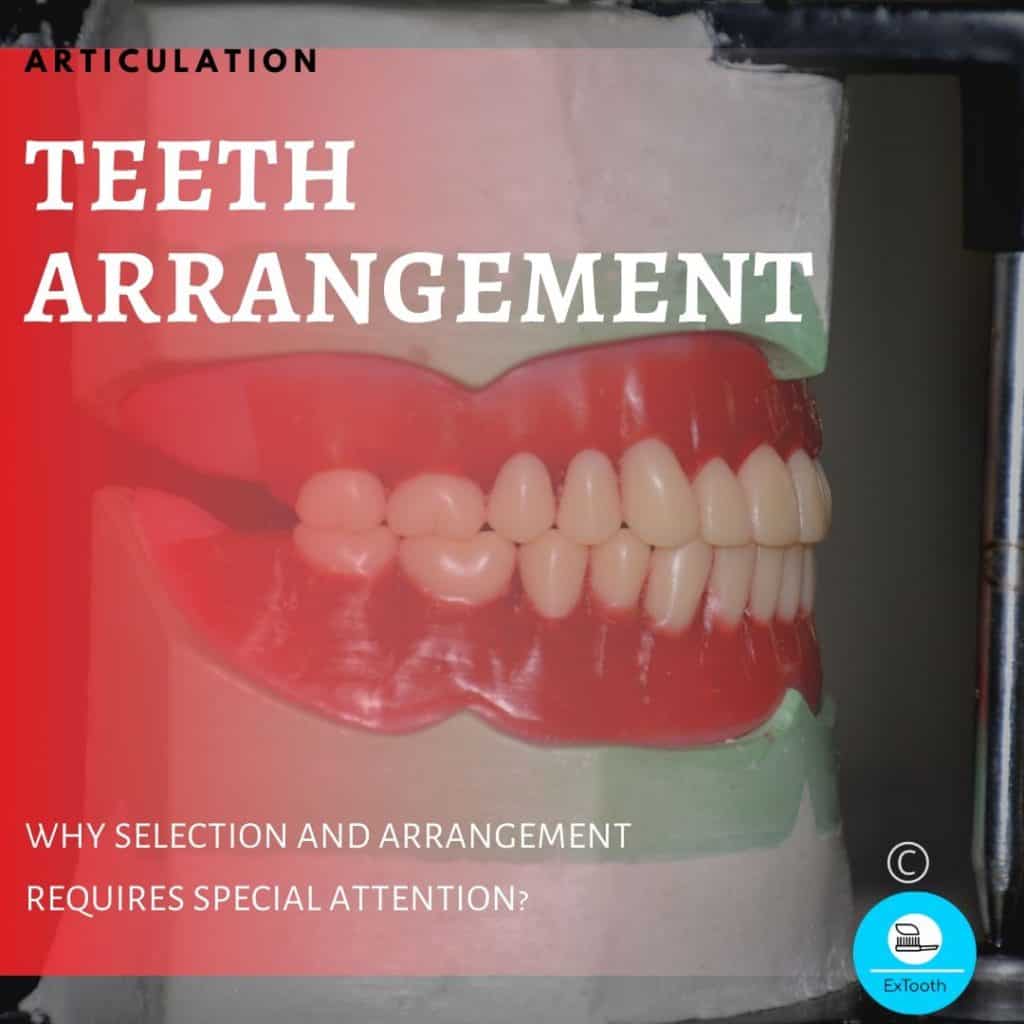
The model is placed on an articulator. It is a standardized device used to reproduce the jaw so that the technician can attach your chosen teeth with wax.
Wax is raised up to match the missing gum tissue, and artificial teeth are placed carefully in the wax to resemble regular teeth as much as possible. This is called setup.
Now, the patient called in for the trial of the denture in the forth visit. The dentist checks the fit of the dentures.
And the teeth that have been selected and placed match gender, overall appearance as per theories. Added information is gathered from old photographs.
Once the relation of Jaw is sealed. We transfer it to articulators.
We arrange teeth according to the shade and size.
TRY IN PROCEDURE- FORTH APPOINTMENT
This appointment is a trial of the dentures.
It is an essential clinical step, as corrections cannot be done after this step.
extooth has got you a separate blog post on try-in procedure.
The technician forms and creates the wax to design the way your gums would see. This is the foundation of your finished dentures.
The dentures are installed in a block device called a flask. Further plaster is splashed in to keep the contour of the dentures, and the flask is then put in bubbling water to vanish the wax away.
Any leftover wax is flushed off. The technician applies a thin separator onto the plaster, so the acrylic doesn’t cling to it.
Acrylic is then introduced into the flask to interchange the wax from permanent denture material and then cured.
Using specific lab tools, the technician carefully slices off the plaster shell. The dentures are then put in an ultrasonic bath to guarantee all remnants of plaster are removed.
The technician will sail any excess acrylic from the dentures and then buff them with pumice.
Your dentures are complete and waiting to be shipped back to your dentist for the initial fitting.
DENTURE DELIVERY – FIFTH APPOINTMENT

It’s the moment when you get your new sets of dentures.
Denture delivery is discussed separately.
Complete dentures in just two days
With the CAD/CAM technology, everything is done in fractions of a second.
Every step is done in the first appointment.
Placement of denture in next appointment.
How long does a denture last?
As you age, your mouth changes. A loose denture makes it challenging to eat or speak. Over a while, when this happens, you need to get your denture relined.
Know the problems associated with complete dentures.
Check out our incredible post denture education program.
Priya Rani
5 Dec 2019Thank you for this detailed yet easy explanation
sangeetaporiya.sp
7 Dec 2019Thanks, Priya. I hope you get a more informative post from our side.
Bren
14 Jan 2020Very educational. Great article
Pingback: 10 Unusual Denture for most common conditions! - extooth
Pingback: Real looking teeth - Characterization of denture! - extooth
ปั้มไลค์
3 Jul 2020Like!! Really appreciate you sharing this blog post.Really thank you! Keep writing.